Let's set up some additional fields to capture information from your customers when they are paying with a reusable payment link or QR code saved in your library.
This feature is available to our Pro plan customers. If you need to learn more about how reusable payment requests work and when to use them, first watch the video guide in the “Get Paid” → “My Library” section of the dashboard.
Video guide
Select “Customisation” and “Data fields” from the main navigation on the left.
You can now add and store data fields and specify the type of data you’re collecting; for example, text, integers, or email addresses. You can also specify whether fields are required or optional.
Add your fields and label them. If you need customers to select a single option from a list, use the “Dropdown” option. You can then add as many choices as you like, with the label displayed to your customer and the selected value reported back to you.
In this example, Alex is creating a reusable link for some branded t-shirts. He adds Small, Medium, and Large using the “Dropdown” option. He’ll now be able to see which size each customer ordered before shipping.
Alex also wants to encourage customers to register for his newsletter, so he creates this as a checkbox field but makes it optional, allowing customers to decide whether they want to subscribe.
Now let’s see what happens when he creates and shares a new reusable payment link with these data fields.
He adds a price and description and selects the fields he’d like to display from those he just created.
Since this is a reusable link, it’s fine to preview, so let’s take a look at how that payment request appears to Alex’s customers.
As we can see, the new fields are displayed, and customers are prompted if required fields aren’t completed.
Once all the information has been gathered, the QR code or payment link will be displayed—depending on whether the customer is using a computer or smartphone.
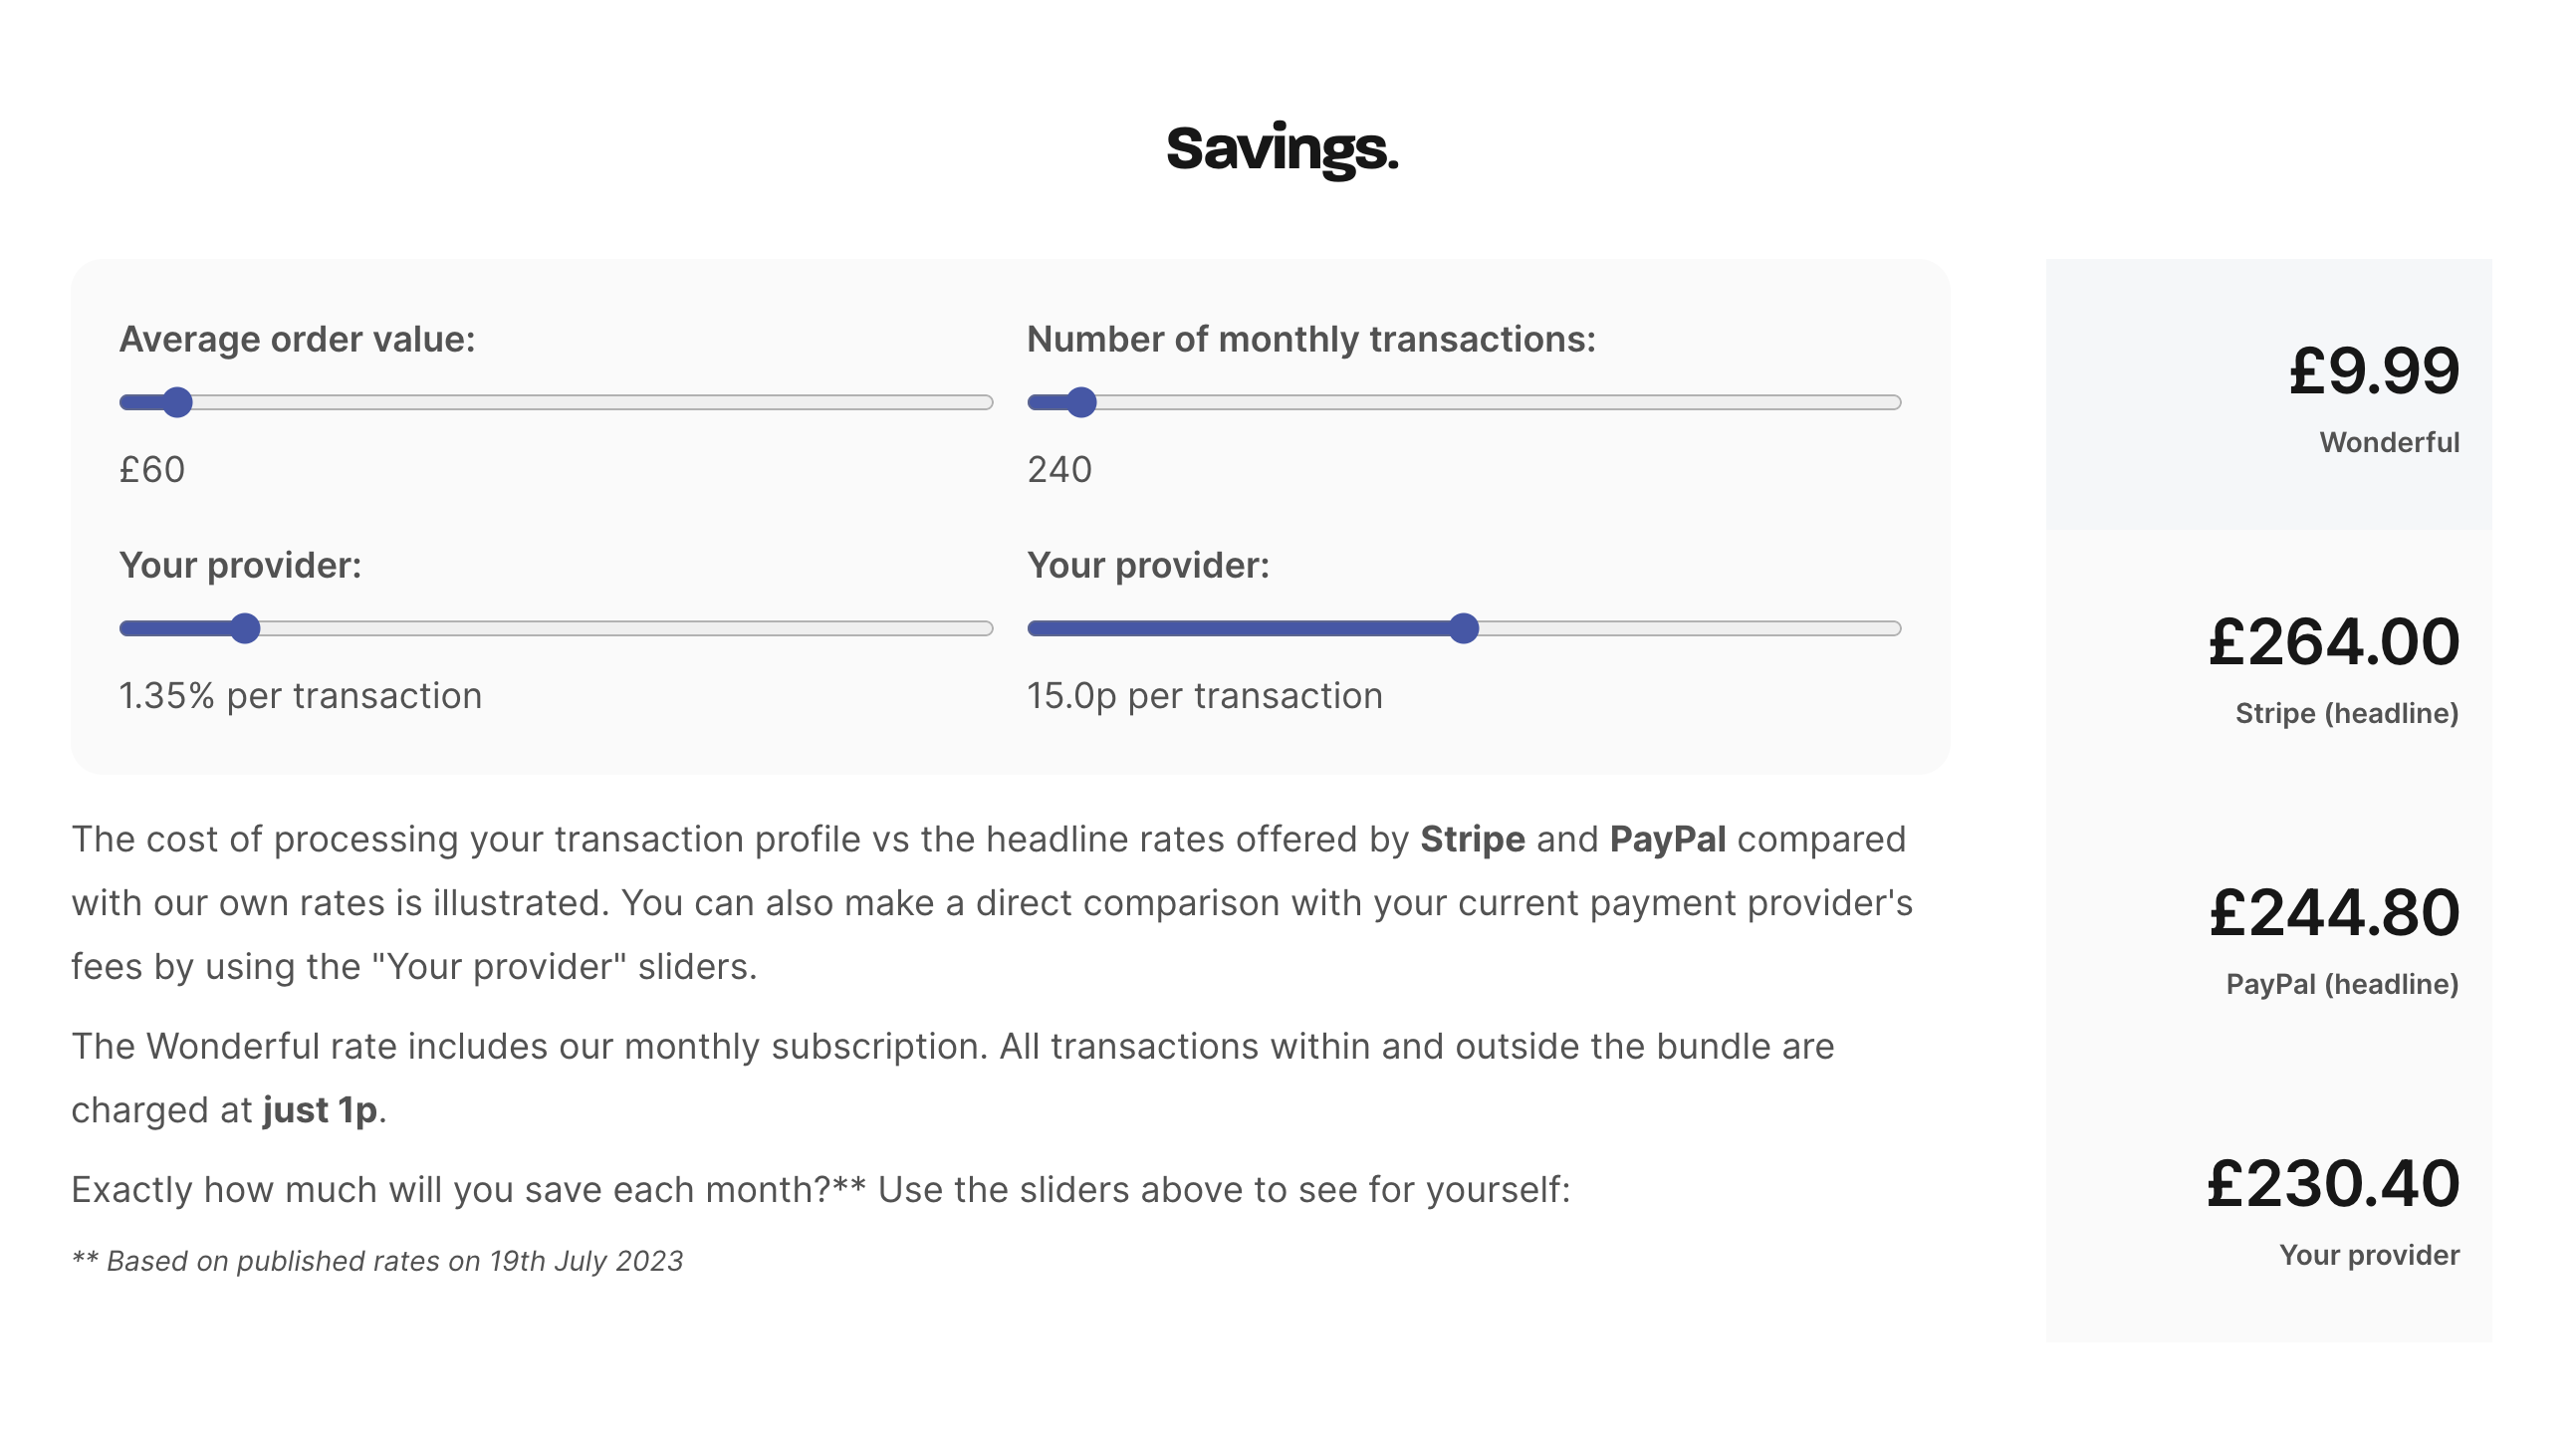
Our highly predictable, transparent and aggressive fee structure, typically saving merchants more than 90% on transaction fees is a simple, secure alternative to debit and credit cards. It also includes instant settlement.
Wonderful's instant bank payment service can be integrated with your checkout. Our public API will be released shortly. Contact our team to find out how much we can save your enterprise business on transaction processing fees.
We do not take a percentage of funds raised, ask for tips, or do anything that prevents 100% of donations going to the causes that charity supporters are so passionate about. We are inspired and driven by that passion.
Payments made through Wonderful are simple, fast and secure. Wonderful is an Authorised Payment Institution regulated by the Financial Conduct Authority and uses Open Banking to facilitate payment initiation.