The ability to brand your customers’ payment journey, email receipts, payment link previews, and post-payment redirection with your organisation’s logo, colours, and messaging is available exclusively to our Pro plan customers.
Select “Customisation” and “Branding” from the main navigation on the left.
You can brand the payment flow, email receipt, and payment link preview.
Video guide
Let’s start by updating the colour. You can select RGB, HSL values, or enter the hex code for your colour. Or, you can simply use the colour picker to select a colour from your logo or anywhere else on your screen.
Once you’re happy with the colour, use the “Choose file” button to add your logo. Select a JPEG, PNG, or WebP image of your logo and upload it. You’ll now see a preview of your branded customer payment journey in the mobile screen on the right.
Check that the text in your footer contrasts well with your chosen colour and switch from black to white, or vice versa.
The last thing to add in this section is a URL to send your customers after they pay. If you have an email newsletter or promotional offer to share, enter the URL here, or simply return customers to your help-desk or home page.
Finally, click the “Save” button to save your changes.
Next, let’s take a look at the email receipt.
By default – and if we captured an email address during the transaction – we’ll send your customers an email receipt. You can disable this by unchecking the box.
Optionally, add a few words to the receipt – for example, a promotion description or shipping information. You’ll see a preview on the right. Once you’re happy with your receipt options, click save.
The last of our custom branding options is the link preview. This is the image displayed with your link in SMS, WhatsApp, emails, and social media. Upload an image, making sure the file dimensions are optimised for compatibility across as many platforms as possible.
That’s it! Click “Save”, and you’re done.
Now, let’s take a look at how that link is displayed when shared in an email.
We’ll select “Get paid” and create a new “Quick payment”.
Enter the amount and a description.
Click “Create payment”.
Finally, copy and paste the link into an email message.
Note that the link preview image has been updated, and the link description now includes the amount to be paid and the recipient’s name – your business or charity.
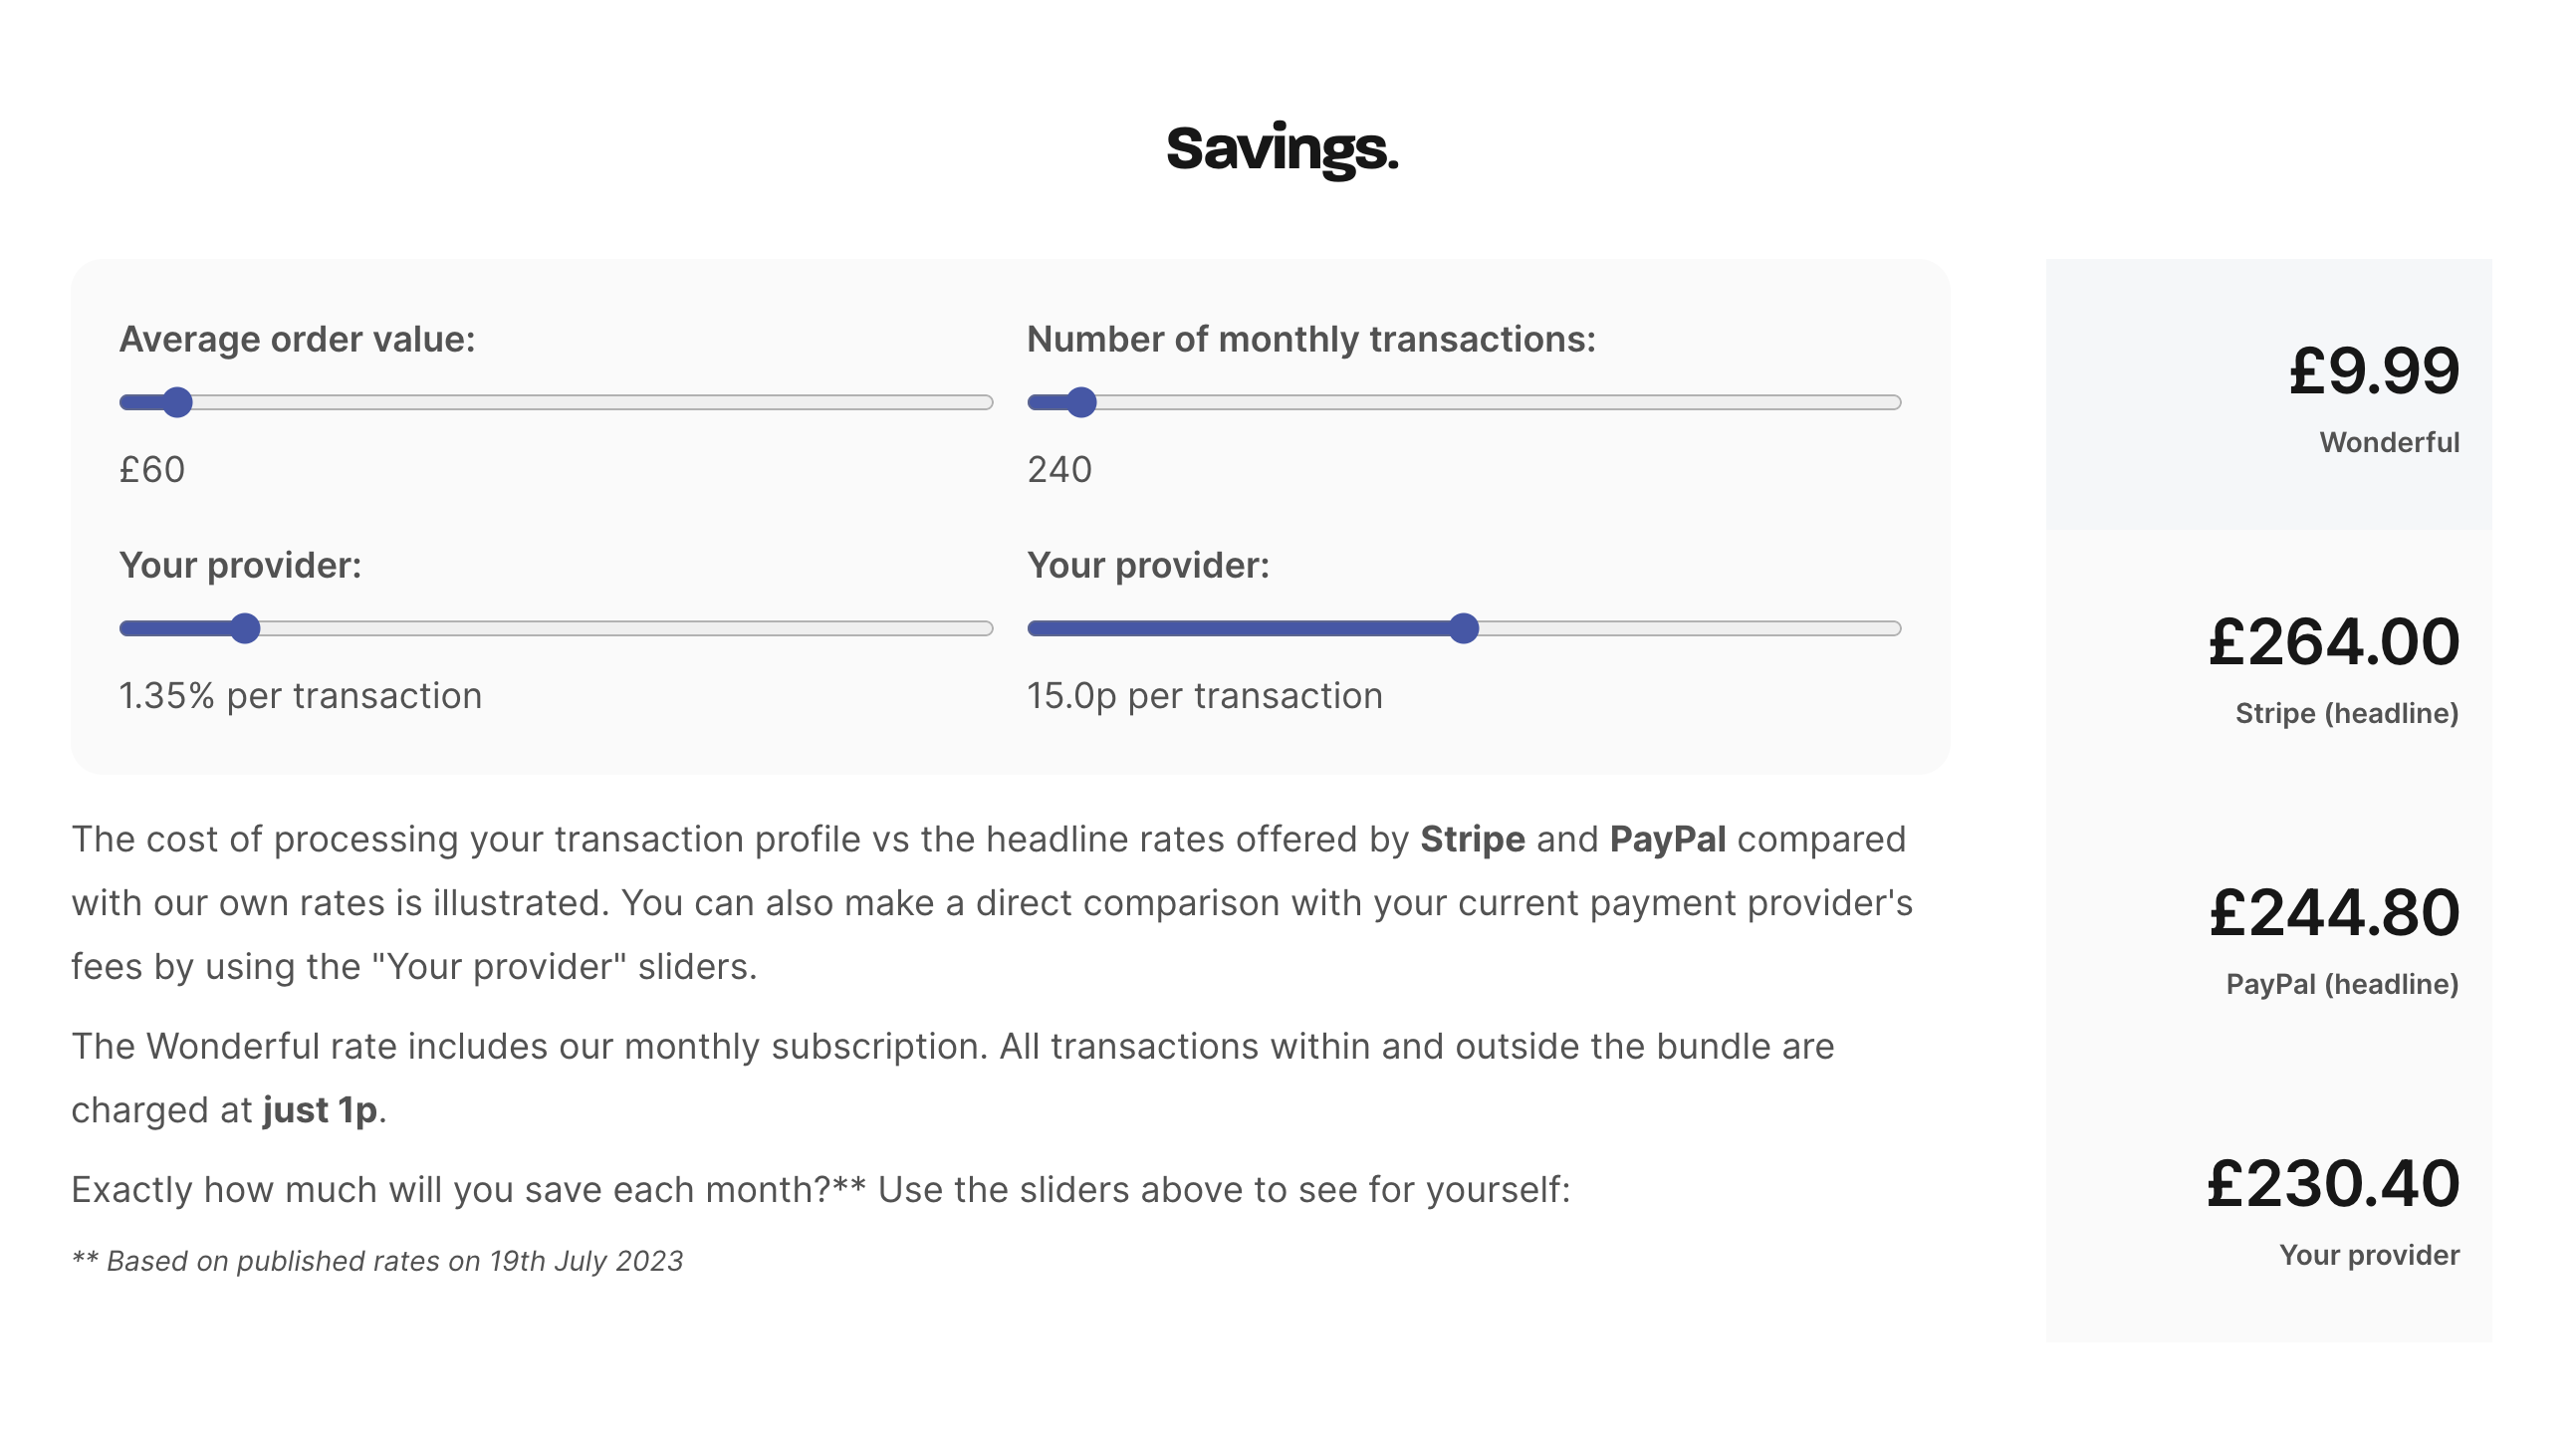
Our highly predictable, transparent and aggressive fee structure, typically saving merchants more than 90% on transaction fees is a simple, secure alternative to debit and credit cards. It also includes instant settlement.
Wonderful's instant bank payment service can be integrated with your checkout. Our public API will be released shortly. Contact our team to find out how much we can save your enterprise business on transaction processing fees.
We do not take a percentage of funds raised, ask for tips, or do anything that prevents 100% of donations going to the causes that charity supporters are so passionate about. We are inspired and driven by that passion.
Payments made through Wonderful are simple, fast and secure. Wonderful is an Authorised Payment Institution regulated by the Financial Conduct Authority and uses Open Banking to facilitate payment initiation.